Monday, May 14, 2018

Final Fantasy moogle multi media birthday gift

A dear friend of mine had their birthday recently, and we play Final Fantasy together. We used to play XI, and now we play XIV. I wanted to give her something FF themed this year.


I formed the moogle out of polymer clay. To make it, I first made a template out of chip board. Rolled my clay flat, and used a blade to carve it out with my template. It's not perfect, but I like it that way. I don't want it to look like it came from a factory.


It's hard to see, but it person you can see it, I used shimmer mists on the flowers.


The butterflies also are shimmered, and colored with some distress inks. Pink in the center, and blue on the tips.


Thursday, May 3, 2018

Final Fantasy themed cards

In a previous post, I showed a comic book card and gift box I made. Today, I'm showing my creations themed with Final Fantasy characters.


 For those of you who aren't into video game, I'll do my best to explain them. This was a birthday card I made for a friend. The little guy on the front here is a moogle, and they call everyone by the name, "kupo".


To the same person the card up above was given to, I made them a Christmas card with a little guy called a cactuar. They are cacti that run SUPER fast around in the desert. 


This next card was for my bf. The name on the front was the name he used in the game we played together, Final Fantasy XI. I had went online and found silhouette pictures of females, and printed them out to scale for what I wanted. I cut out some butterfly wings and turned her into a fairy. My name being Pixie and all, I wanted it to have a personal touch.

I fussy cut a bunch of leaves/plants and moths from this beautiful paper pad I have, Habitat by Recollections.  


At the time of making these, I didn't take pictures for records, or plans on doing a blog or anything, so sometimes I have to block out sentiments that have been written. On the inside, I have made what are called a mandragora (left), and a lycopodium (right). For those of you who don't know the games or characters, the names won't mean much, but for those who do, I'm sure you will appreciate the effort put into making these cuties! 


This next card, instead of making a chipboard template and cutting out colored cardstock to make the characters, I drew the character on paper and colored it by hand. I drew this little guy, called a chocobo on watercolor paper, and colored with watercolor pencils. The "kweh!" is the sound it makes in the game. I also distressed the black cardstock base, giving it a weathered look. 


Last, but certainly not least, is my very first mini album I ever made. It was Final Fantasy XI themed, and showed pictures of my time spent at a fanfest. Please check the video out by clicking the link (if it isn't clickable, simply copy/paste into your search bar). If you liked what you saw, please give my video a thumbs up! I hope you enjoyed seeing my nerdy crafts, video game fan or not! 

https://www.youtube.com/watch?v=08NmCD_vgeI


Wednesday, May 2, 2018

Sympathy card

Today I will be showing a card I made for a dear friend. Sadly, tragedy can happen to anyone at any time. But with love and support, we can help those affected by it though the hard times.


For this card, I used a pink cardstock base, and distressed the edges with smokey distress ink from Tim Holtz. The pattern paper I used here is from Recollections Modern Bouquet paper pad. 


The "Family Forever" wording I got from Michaels in their lazer wood cut section. They have a very nice selection these days, I do enjoy looking around. The prices are really great too! The lace is just some red lace I picked up from Wal-Mart. It comes in a little plastic ball, various colors. I always grab a few while I'm there in at least white and black.


Upon opening the card, on the left side is for my sentiments. White on pink cardstock, distressed with smokey ink. I used clear flat black bling in the corners. The feathers are die cuts from Spellbinders.


The feather on top I used a pop dot to give it a 3-D effect. 


Looking to the right inside the card,  you will find wording saying "You are not alone" die cut out of an alphabet die in dark and light pink cardstock. Still using the feathers on this page, I also added a pixie in the corner (representing myself - I am Pixie after all!) All the flowers on the front and back have been made with a 5 petal flower punch. 


Tuesday, May 1, 2018

Deadpool themed birthday card

Today I'm showing a birthday card using parts from a comic book. Fun part about papercrafting is you can literally use anything you want! For this one, I used a Deadpool comic. I love my comic books, so it's a little painful to chop them up, but I used a new comic, instead of an older one that costs more money, so it's not as bad.

Where I live, it's a little town about 45mins out of the city, so we don't really have a lot of cool shops to buy stuff like this from, so I went to a little store we have that sells some comics. When I asked the guy who owns it if he had any new ones that just came out, he said he only had 2 copies, as he mostly handles older comics that are stored in plastic and placed in boxes. The cheapest they had of those was $25, and of course, no way would I chop on of those up! Especially for those kind of prices. 


It probably would have been just as easy to find pictures online, and print them out on cardstock, which, next time I will have to do that, but I just wanted the comic this time around because I was going to do more than just make a card. It was a card and gift combo for a friends birthday.

The guy at the store almost had a heart attack when he asked why I was buying both his new copies of Deadpool lol of course he wouldn't want to hear I'm cutting them up! I grimace a little at the thought too, but I've done this before, so I knew what I was doing. When I was in HS, I used to spend every single Saturday in a comic book shop with my dad. We would spend hours looking around, reading comics, talking with the employees. We knew everyone there, and they always took good care of us! I would buy extra comics of the ones I knew friends liked, and would make boxes decorated with the pages. It was so they could keep snacks or little things in them in their rooms or backpacks. 


Inside the card I kept simple. Deadpool and a small space to put sentiments. 


You can really do this with any comic book, or even game magazine (which, I have a ton of!) Things like this I find are great for older kids/teens, or even just boys. Lets face it, most of us crafters are women, and we tend to make our cards a bit on the girly side lol I love it, but my 17yr old nephew, not so much. 

Along with my card, is the box I made. I honestly can't remember if got the boxes at Joanns, Michaels or Hobby Lobby... but it doesn't really matter. I got plain chipboard boxes, comes 3 to a set for a few bucks. I painted the box black with black acrylic paint, then found the pictures I felt were the best for the box. 


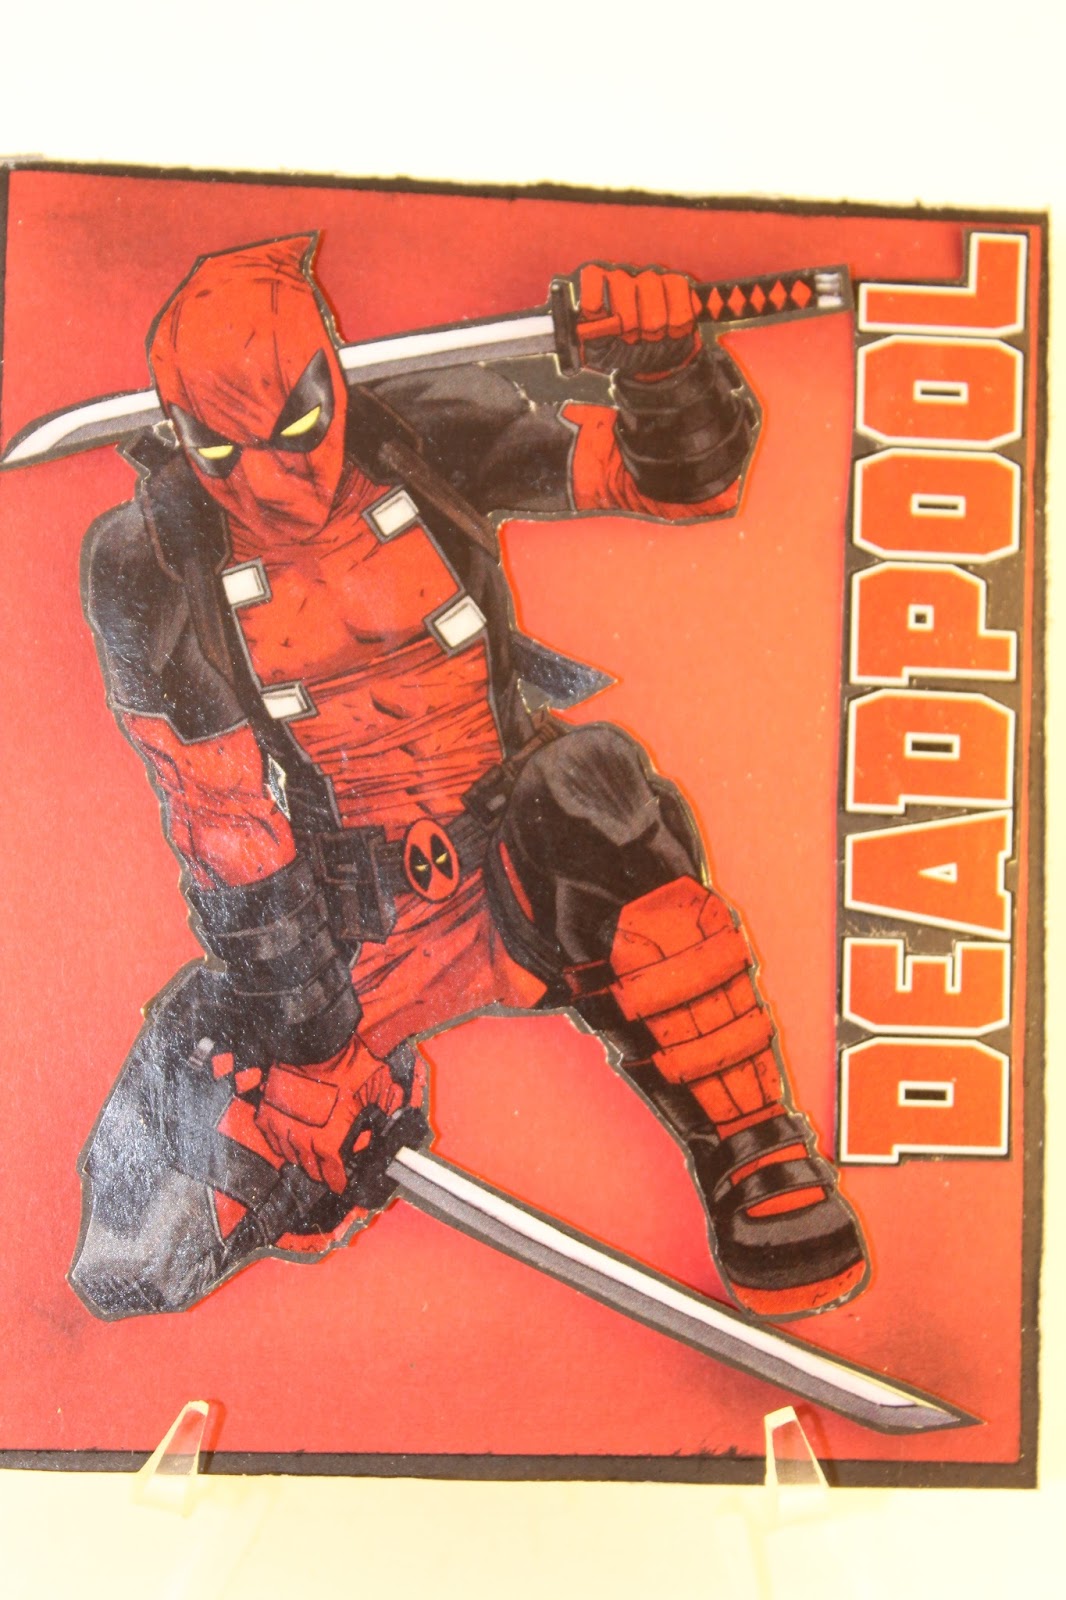
While I was purchasing my comics at the little shop, the guy gave me a few flyers with Deadpool on them to try and get me to not chop up a perfectly good comic lol. It was very nice of him to include a few different things for me for my project. On the inside of the box lid, I put my comic page down like I did for the rest of the box, but, one of the flyers the guy gave me was very thick, and I loved the picture on it. Because of the size of it, I didn't really have anywhere I could put it, so I though it would be cool when the lid was removed, this badass looking picture would pop out at you! I used pop dots on it so it would stand out. 


And last, the inside of the box. 


Monday, April 30, 2018

8x8 Teresa Collins Gold Glam Mini Album


Hello everyone! Today I am sharing an 8x8 mini album I made special for a customer, and personal friend. I used the Teresa Collins Gold Glam paper pad. The front of the album I cut out a sign from Tim Holtz Alterations Hanging Sign die. The "family" wording was purchased from Michaels in their laser-cut wood section.


The white and gold flowers were from Prima, and I had purchased them probably almost 2 years ago for a project, and just never ended up using them, until now that is!


On the spine, I used a blue ribbon I've had for many years. It originally came on some presents from Kohls. They were such nice ribbons, and I loved the color, I decided to save them. Glad I did! The camera charm came from Hobby Lobby. The gold and pearl I thought added a nice touch to the existing colors of the album.


I made 95% of the embellishments in the album myself. At the end of the blog, I will give a list of dies I used to create all my embellishments. 


The circles that are throughout the album, and even on the spines charm, the paper collection had a page with them for you to cut out. I used a die to cut them all out, as it was the perfect size. 


The "You & Me" sticker was from an anniversary sticker pack I had purchased a while ago. Can't remember which brand since I don't have the packaging, but I got it from either Michaels, or Hobby Lobby. 


A few of my embellishments have clock face centers. I purchased those years ago on clearance from Michaels I do believe... I had since discarded the original packaging and put them all in an embellishment holder, to keep all my items organized. 


To see the entire album, please check out the link I've added! https://www.youtube.com/watch?v=SMoXeitgHMQ

List of supplies: 
  1. We R Memory Keepers Crop-A-Dile Corner Chomper
  2. McGill pine branch punch
  3. Spellbinders Moroccan Accents
  4. Spellbinders Ironworks Accents
  5. Spellbinders Grommet Tags
  6. Spellbinders Feathers
  7. Spellbinders Foliage Flourish
  8. Sizzix Tags, Scallop Combo #2
  9. Tim Holtz Sizzix Tiny Tabs & Tags
  10. Tim Holtz Sizzix Hanging Sign
  11. Teresa Collins Gold Glam paper pad
  12. MayMay Made It The Envelope Please stamp set